A Year of Progress – Front Door
The Blog
A few weeks ago I “celebrated” my first full year of life in Pittsburgh. To be honest, it’s been a bit of a rough one. People tell me that moving to a new city is never easy. I suppose they’re right. As I’ve mentioned, after accepting then relinquishing a job that was far from my expectations, I dove into some much anticipated home renovations, taking only small hiatuses for weekend trips and visitors. Now, as projects are wrapping up and my pace is slowing, it’s time for some reflection — both personally and professionally. I’m ready to formally share some of my handiwork, as flawed and mistake filled as it may be, and share a bit of what has been both my joy and sorrow over the last 12 months. I’m ready to appreciate these changes, and I hope you will too. I feel the need to make the disclaimer that none of this happened overnight. Many hours were invested, some blood and many tears were shed. Nothing is more frustrating to me than a blogger who pretends that home improvement is easy and quick. It requires lots of money and planning, and not everyone has sponsors and a team of family members/friends who come over every weekend to help speed up the big projects (picture me prying my own kitchen cabinets off the wall by myself in the direction of my face). That being said, let’s skip to the pictures.
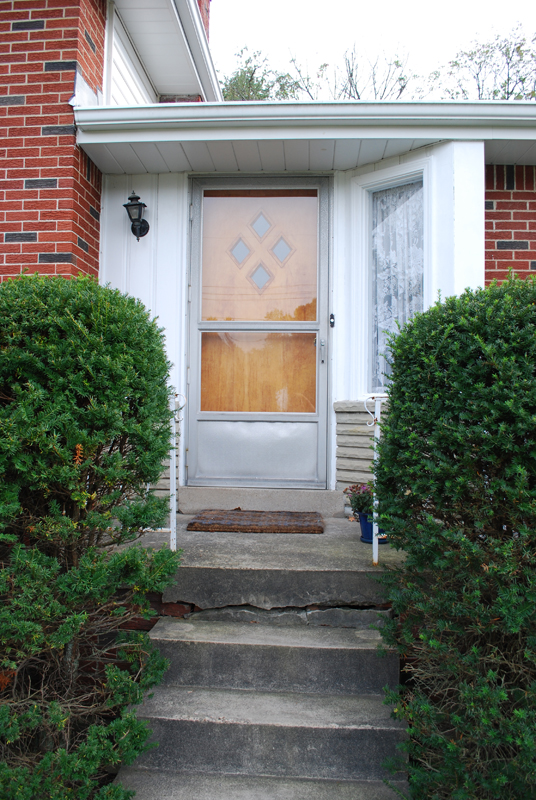
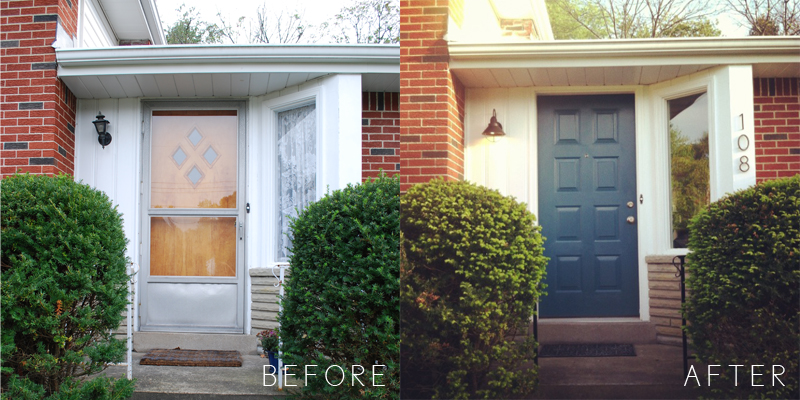
I feel there is no better place to start with an update than the front door. As the cheery folks at younghouselove.com say, “the door is the smile of the house.” Perhaps you’ll remember these plans that I shared almost a full year ago, as we were having our windows and exterior doors replaced. At long last, they’ve nearly come to life. Here’s where we started:
The original 1960s wood door was showing it’s age, both physically and in terms of style. The varnish was chipping off and the color was doing absolutely nothing for the curb appeal of the home. If memory serves, I also think we were lacking a deadbolt. In the interest of energy efficiency, safety, and style, we opted to replace the door with the rest of the windows.
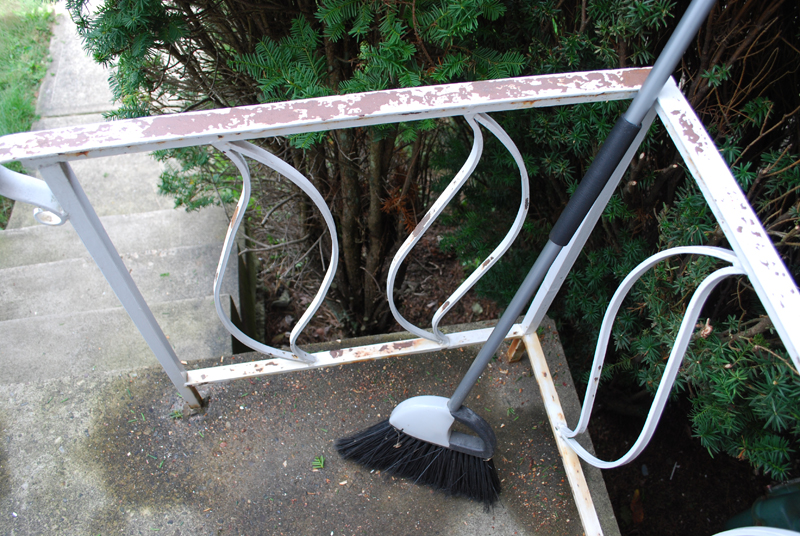
We took the front door replacement as a cue to take care of some other plain old maintenance items, including re-coating the paint on the wood areas in the entry and on this rusted railing.
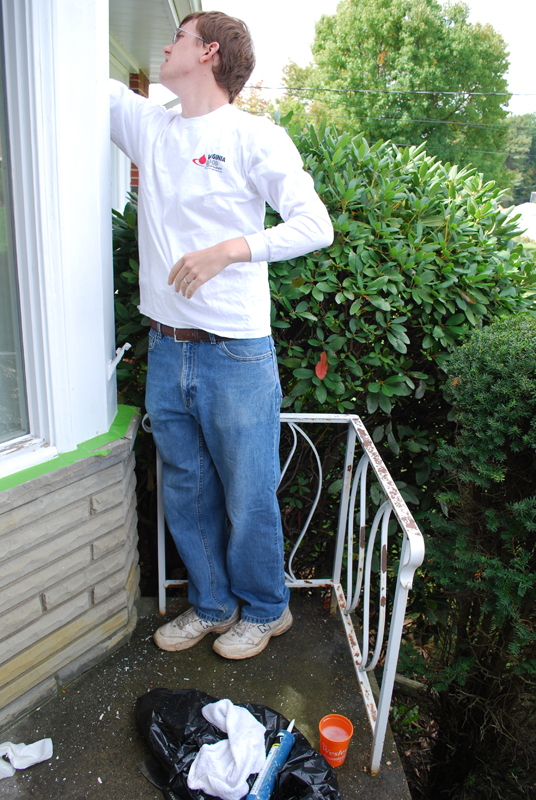
Here’s Alex repainting some wood paneling around the corner. Our process included scraping all loose paint with a paint scraper and/or wire brush, filling in gaps with caulk, priming, and painting. Note all the paint chips littering the stoop.
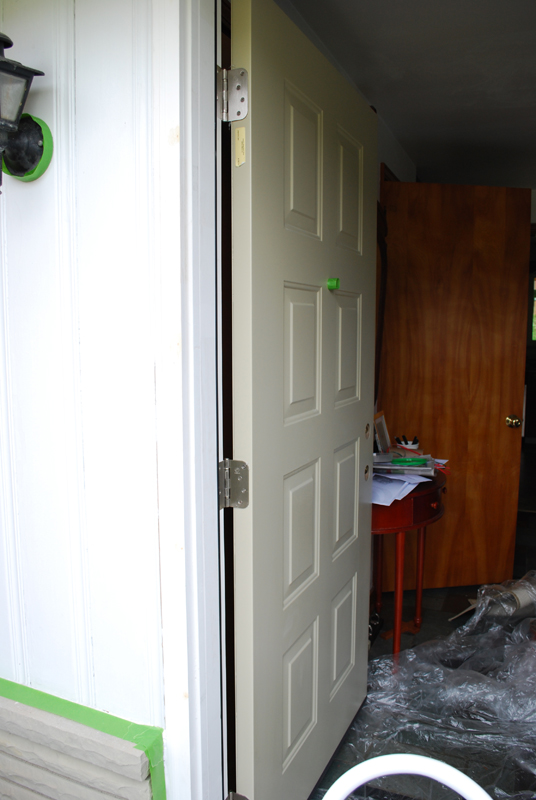
Luckily, the front door came pre-primed (with a beige primer) so we just sanded it lightly and went to town with a high density foam roller and high quality brush.
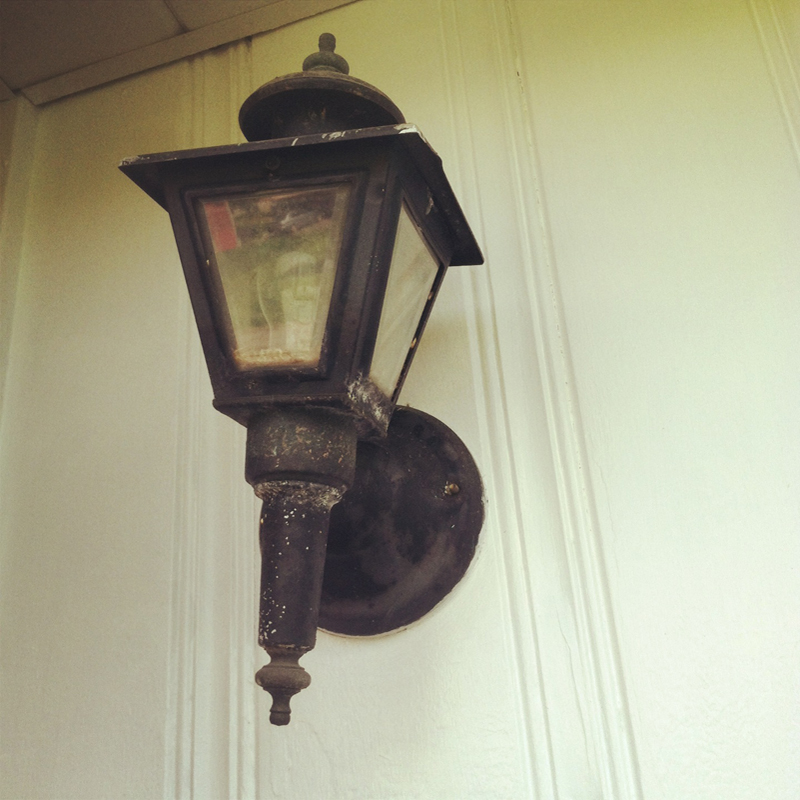
The old light fixture was also crying out to be replaced. This one was a bit too traditional (and also, disgustingly bug filled and dirty) for my taste.
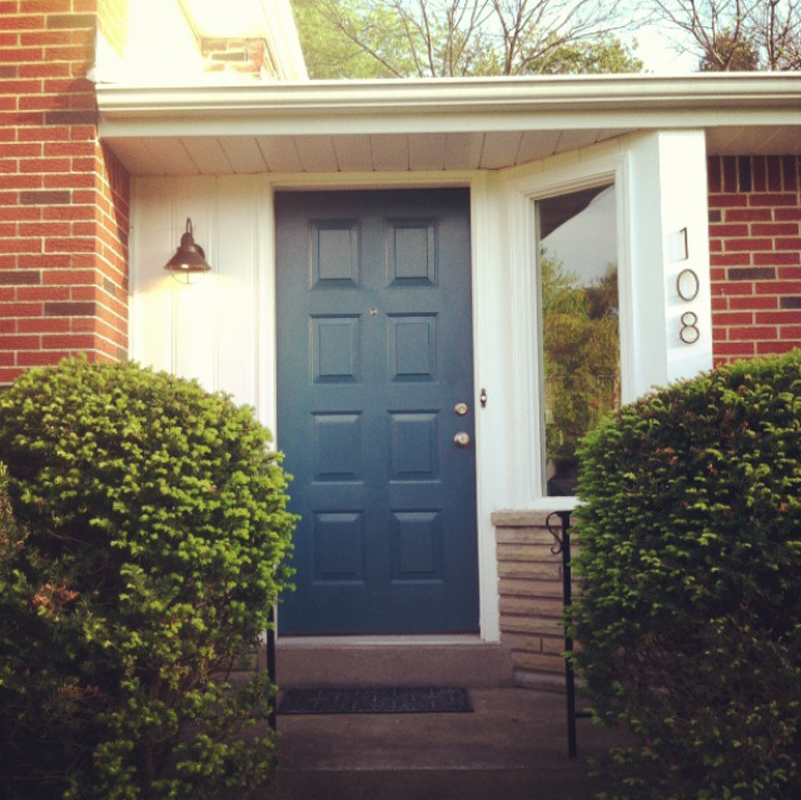
The result of our hard work was this. There’s still a bit more to be done (our front steps are in desperate need of replacement), but I think it’s looking a bit more cheerful these days. The raised panels on the front door provide just the right amount of traditional style to the front of the home, mediating some of the other traditional elements of the facade. When combined with the modern light fixture and house numbers, I think it results in the perfect blend of old and new. I think it works well in that the combination also speaks to the character of the home, as many original features fall in the same line. Note, for instance, the existing gray brick and the way it incorporates both a traditional material (natural quarried stone) and modern proportions (long and linear).
The paint on the door is an exterior semi-gloss in Martha Stewart Living’s “Plumage” from Home Depot. For the wood areas, we used Behr’s “Ultra Pure White” in exterior semi-gloss as well. On the railing, we used a Rustoleum primer and black oil-based paint to help prevent future rusting. The new light fixture is a version of the one I originally selected from Kichler, found here. My only wish is that the light was a bit higher on the wall so the door was more illuminated at night. Right now, the fixture downcasts all the light towards the ground. I may end up changing it out down the road — we’ll see. The house numbers were purchased at Home Depot. Last but not least, I moved our old coir doormat to the door to our covered patio and replaced it with a geometric rubber one from Target (it doesn’t seem to be listed on their website anymore). This was because our gutter leaks a little on the stoop and the coir mat was too thick to dry in this north-facing location.
Altogether, this painting portion of this project took us the better part of a weekend last fall. Between all the prep, scraping, taping, and 4-hour recoat times, it wasn’t as quick as I had expected. The light fixture and the house numbers took about an hour to install on a afternoon a few months later. Oh, and removing that hideous lace curtain took about 5 minutes and was done gleefully in preparation for new windows. I still haven’t settled on a replacement but it seems okay untreated for now.
Ta-da!
More to come!
August 27, 2013
Leave a Reply Cancel reply
F: 9:00am-3:00pm
It look so GREAT! Love it Lauren!
Thank you, Emily!! Hope you’re doing well!
Beautiful, Lauren! Really great work. I’ll come hire you to help me figure out my house one day…you know, when I own one 🙂 hope you and alex are well!
Thanks, Morgan!!
As you well know, I am so proud of your accomplishments. I love your blog. Great job!!